
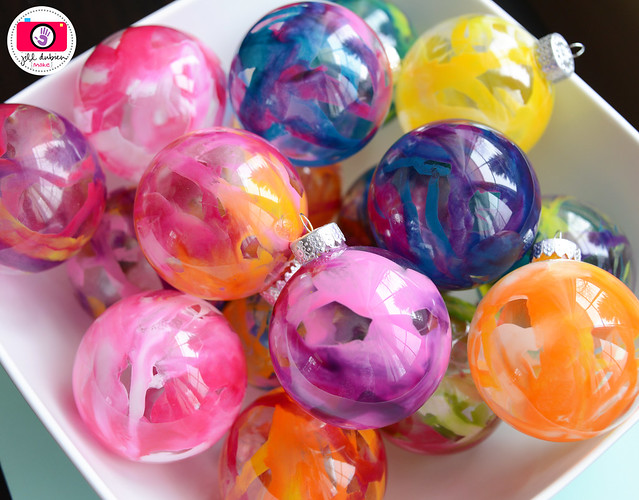
Welcome to day 4 of my 12 days of Christmas! Today I'm going to share a DIY project that my younger sister and I plan on making. We haven't actually had time to make them but I'll put the Pinterest picture below. These look like you spent hours making them but they are super easy. You can give them as gifts or use them on your own tree. Let me know if you try it out by tweeting a picture to me @jerica_89.
What you'll need:
1 package of Crayola crayons
Sharp knife
1 package of clear glass ornaments
Hair dryer
A pair of thick gloves
Directions:
1. Take your crayons out of the box and using your knife peel the wrappers from the crayons. Once your crayons are peeled, cut your crayons into small pieces. You'll need about 6 pieces per crayon.
2. Take the silver top off your ornament and place 3-4 crayon pieces into the ball. Make sure you use glass ornaments because plastic will melt. Experiment with color combinations and have fun!
3. Put the silver top back on the ornament and put your gloves. Turn your hair dryer on high heat and hold your ornament in your gloved hand. Heat up the crayons until they start to melt and then swirl the ornament around in your hand so the colors swirl all over the inside of the ornament. Don’t melt the crayons completely, it will be too much. Once you are satisfied with the look, turn off the blow dryer.
4. Take the silver top back off the ornament and turn the ornament upside down over a plate or bowl. Turn your hair dryer on once again and heat up the crayons until they fall out of the opening at the bottom and on to your plate or bowl. Put the silver top back on your ornament and that's it!
xo,
Jerica

No comments:
Post a Comment